
Cycling cleats are a game-changer for cyclists of all levels, offering improved power transfer, enhanced stability, and greater comfort during rides.
However, the process of installing and adjusting them can seem daunting, especially for beginners.
In this comprehensive guide, we will walk you through the entire process step-by-step.
And ensuring that your cleats are perfectly fitted to your shoes and customized for your riding style.
The Importance of Proper Cleat Positioning
Proper cleat positioning isn’t just about comfort; it’s about efficiency. When your cleats are in the right spot, you get the most power from your legs to the pedals.
This means you can ride longer and faster with less effort. Imagine cycling up a steep hill and feeling every pedal stroke pushing you forward with little strain. That’s the power of proper cleat positioning.
Preventing Common Cycling Injuries
Incorrect cleat positioning can cause many injuries, such as knee pain, Achilles tendonitis, and plantar fasciitis. These injuries can hinder even the most dedicated cyclists.
By ensuring your cleats are properly aligned, you can avoid these common issues and enjoy a pain-free ride. Think of it as a small investment of time that pays off in miles of comfortable cycling.

Tools and Preparation
Before you start installing your cleats, it’s important to gather the right tools and prepare your cycling shoes. This preparation sets the stage for a successful installation.
Essential Tools for Cleat Installation
Markers and rulers are essential for accurately marking the best cleat position on your shoe. These tools help you ensure your cleats are aligned correctly, which is crucial for both comfort and performance.
The right wrenches and screwdrivers are needed for securely fastening the cleats to your shoes. Using the right tools ensures the cleats are tightly secured, preventing any movement that could cause discomfort or injury.
Preparing Your Cycling Shoes
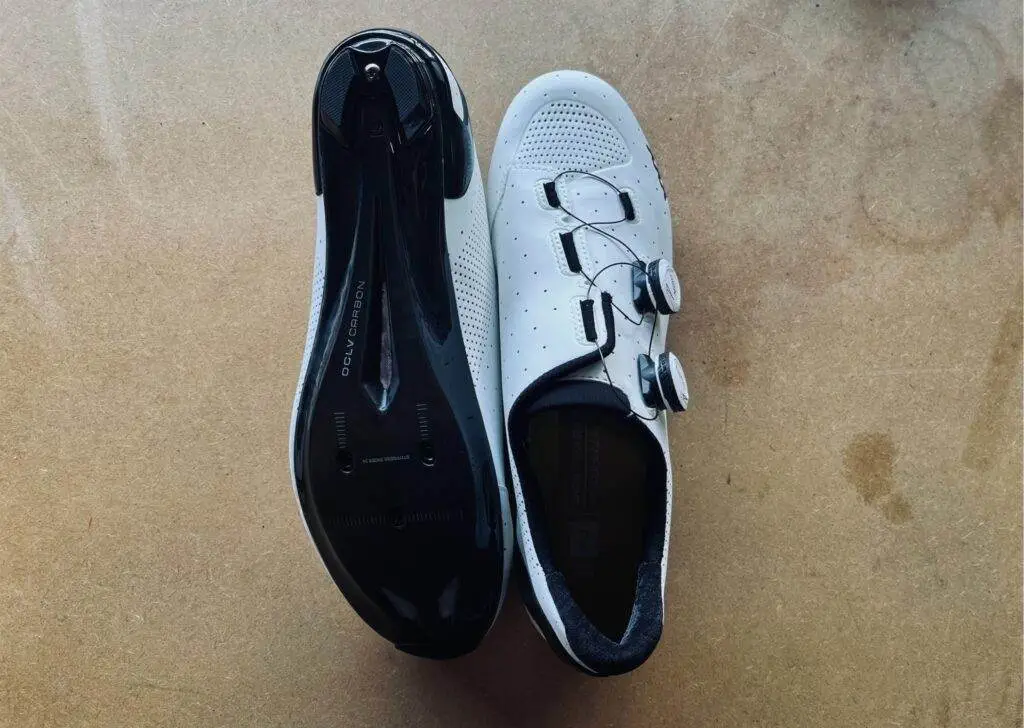
Cleaning the Shoe Sole
A clean shoe sole is important for a secure cleat installation. Dirt and debris can interfere with the cleat’s attachment, leading to a less stable connection. Take the time to thoroughly clean the sole of your shoe before you begin.
Ensuring a Debris-Free Cleat Area
Make sure the area where the cleat will be attached is completely free from debris. This ensures a secure fit and prevents any movement of the cleat during your ride.
Marking the Shoe for Cleat Installation
Accurate marking of your shoe is a critical step in the cleat installation process. This step ensures your cleats are positioned correctly for optimal performance.
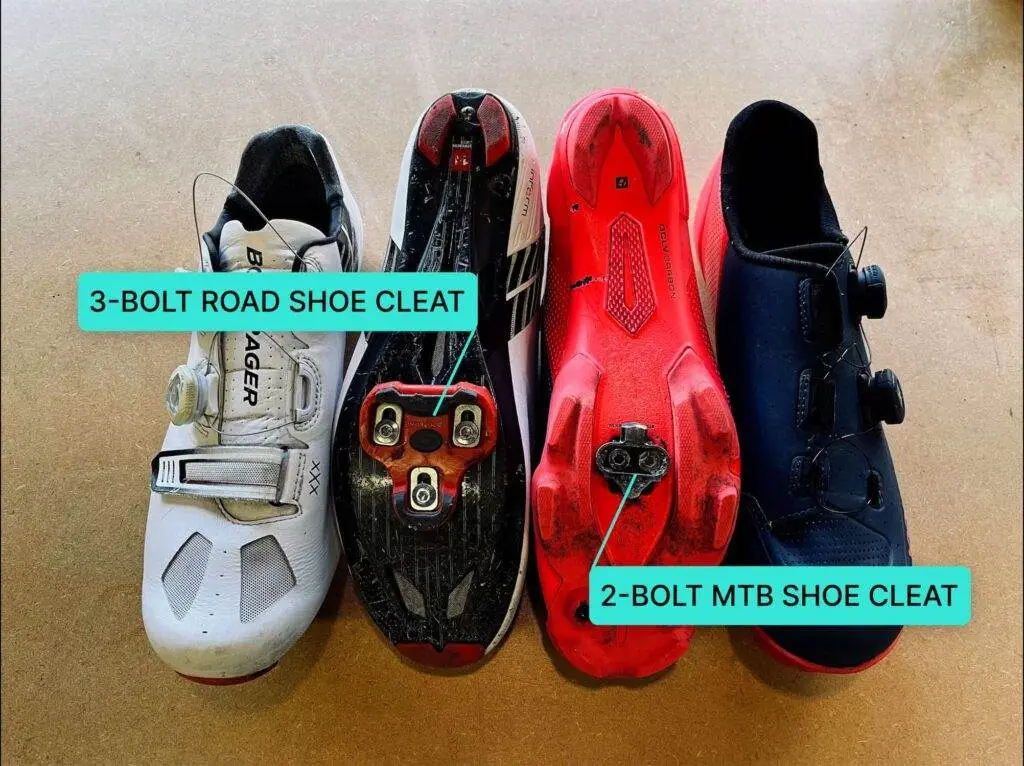
Identifying Metatarsal Heads
Start by identifying the first and fifth metatarsal heads, which are the bumps on the inside and outside of your foot. These points serve as reference markers for finding the best cleat position.
Drawing the Optimal Cleat Position Line
Once the metatarsal heads are identified, draw a line across the sole of the shoe to find the ball of the foot. This line helps you position the cleat in the best spot for power transfer and comfort.
Positioning the Cleats
With the shoe marked, the next step is to position the cleats accurately. This step is crucial for ensuring your cleats are aligned correctly.
Aligning the Cleat with the Ball of the Foot
Align the cleat with the mark indicating the ball of the foot to ensure it is centered correctly. This alignment is essential for maximizing power transfer and reducing strain on your muscles and joints.
Adjusting the Fore-Aft Position
Fine-tune the fore-aft position of the cleat to achieve the perfect alignment. Ensure the cleat is centered under the ball of the foot for optimal performance.
Setting the Cleat Angle
The angle of the cleat is crucial for matching your natural foot position. Adjust the cleat angle so it aligns with your natural foot position, usually with the toe pointing slightly inward. This alignment helps prevent injuries and enhances comfort.
Securing the Cleats
Once the cleats are positioned correctly, it’s time to secure them in place. This step ensures your cleats stay stable during your ride.
Tightening Cleat Bolts
Use the right tools to tighten the cleat bolts securely. This step is crucial for ensuring the cleats do not move during your ride.
Be careful not to over-tighten the bolts, as this can damage the cleats or the shoe. Tighten the bolts just enough to secure the cleats without causing any damage.
Double-Checking Alignment
After securing the cleats, double-check the alignment to ensure everything is in place. This step helps you catch any misalignments before they cause discomfort or injury.
Make any necessary minor adjustments to perfect the cleat position. These small tweaks can make a big difference in your comfort and performance.
Testing and Fine-Tuning Cleat Position
Testing and fine-tuning are essential to achieving the perfect cleat setup. This step ensures your cleats are positioned for maximum comfort and efficiency.
Initial Test Ride
Take an initial test ride to evaluate the cleat position. This ride helps you identify any issues with the cleat alignment.
Pay close attention to your comfort and pedaling efficiency during the test ride. These observations help you determine if any adjustments are needed.
Making Small Adjustments
Based on your observations, make small adjustments to improve the cleat position. These adjustments help you achieve the perfect alignment for your needs.
If you experience any discomfort or pain, adjust the cleats accordingly to alleviate these issues. Proper cleat positioning should eliminate any discomfort and enhance your riding experience.

Additional Insights on Cleat Positioning
Beyond the basic installation and adjustment, there are additional insights to consider for optimal cleat positioning. These insights help you achieve the best possible performance and comfort.
Preventing Cycling Injuries
Proper cleat positioning plays a crucial role in preventing cycling injuries. By ensuring your cleats are correctly aligned, you can reduce the risk of common injuries.
Correctly aligned cleats can help prevent knee pain and Achilles tendonitis. These injuries are often caused by improper cleat positioning, so taking the time to align your cleats correctly is essential.
Proper cleat positioning can also reduce the risk of plantar fasciitis. This condition is caused by strain on the plantar fascia, which can be alleviated by ensuring your cleats are correctly aligned.
Enhancing Pedaling Efficiency
Optimal cleat positioning enhances pedaling efficiency by ensuring maximum power transfer. This efficiency helps you ride longer and faster with less effort.
Positioning the cleats correctly ensures the power generated by your legs is efficiently transferred to the pedals. This transfer maximizes your performance and reduces strain on your muscles and joints.
Understanding Cleat Float
Cleat float refers to the degree of side-to-side movement allowed by the cleat while clipped into the pedal. Understanding cleat float is essential for achieving the best possible performance and comfort.
Degrees of Lateral Movement
Different cleats offer varying degrees of side-to-side movement, known as float. This movement allows your foot to move slightly while clipped in, which can enhance comfort and reduce strain.
Choosing the Right Amount of Float
Selecting the right amount of float is essential for reducing stress on the knees. The right amount of float helps you achieve a comfortable and efficient ride.
The right amount of float can help reduce stress on the knees, enhancing overall comfort. This reduction in stress helps prevent injuries and improves your riding experience.
Professional Bike Fitting
For those struggling to find the perfect cleat position, a professional bike fitting can provide personalized adjustments. This fitting ensures your cleats are aligned for your unique biomechanics.

Personalized Adjustments
Professional bike fitters offer personalized adjustments based on individual biomechanics. These adjustments help you achieve the best possible cleat position for your needs.
Advanced Tools and Techniques
Bike fitters use advanced tools and techniques to analyze pedaling motion and recommend optimal cleat settings. These tools help ensure your cleats are aligned correctly.
Analyzing your pedaling motion helps in determining the best cleat position for your unique biomechanics. This analysis ensures your cleats are aligned for maximum comfort and performance.
Maintenance Tips for Cycling Cleats
Regular maintenance of your cycling cleats is essential for ensuring their longevity and performance. These tips help you keep your cleats in top condition.
Regularly Checking Cleat Bolts
Periodically check the cleat bolts to ensure they are securely fastened. This check helps prevent any movement of the cleats during your ride.
Inspecting Cleats for Wear and Tear
Regularly inspect your cleats for signs of wear and tear. This inspection helps you identify any issues before they affect your performance.
Replacing Worn Cleats
Replace your cleats when they become worn to maintain secure engagement with the pedals. Worn cleats can lead to discomfort and reduced performance, so replacing them is essential.
Conclusion
Achieving a comfortable and efficient cleat setup is crucial for enhancing your overall riding experience. By following the guidelines outlined in this article, you can achieve a cleat setup that maximizes comfort and efficiency.
Achieving a Comfortable and Efficient Cleat Setup
By following the guidelines outlined in this article, you can achieve a cleat setup that maximizes comfort and efficiency. This setup helps you ride longer and faster with less effort.
Enhancing Your Overall Riding Experience
A well-adjusted cleat setup not only improves performance but also enhances your overall cycling experience. By taking the time to properly install and adjust your cleats, you can enjoy a more comfortable and efficient ride.
FAQs
How do I know if my cleats are positioned correctly?
Proper cleat positioning should feel comfortable and efficient. If you experience any discomfort or pain, you may need to adjust the cleats.
What tools do I need to install cycling cleats?
You will need markers, rulers, wrenches, and screwdrivers to install cycling cleats. These tools help you accurately mark and secure the cleats.
How often should I check my cleat bolts?
It’s a good idea to check your cleat bolts regularly, especially before long rides. This check helps ensure the cleats are securely fastened.
What is cleat float, and why is it important?
Cleat float refers to the degree of side-to-side movement allowed by the cleat while clipped into the pedal. The right amount of float can enhance comfort and reduce stress on the knees.
Can a professional bike fitting help with cleat positioning?
Yes, a professional bike fitting can provide personalized adjustments based on your unique biomechanics. This fitting ensures your cleats are aligned for maximum comfort and performance.
When should I replace my cycling cleats?
You should replace your cycling cleats when they become worn. Worn cleats can lead to discomfort and reduced performance, so replacing them is essential.
By following these guidelines and considering additional insights, cyclists can achieve a comfortable and efficient cleat setup, enhancing their overall riding experience.